Leaderboard


Popular Content
Showing content with the highest reputation on 11/24/15 in all areas
-
@J95 I had a quick go with the new drivers, I did not do the power drain, I only power drain if I absolutely need to (had a bad experience, so I stay away from anything what might surprise me with a dis-assembly) The 359.00 drivers are Almost ok for the M18x R2, In the testing I did (3DMark11, Firestrike, Crysis 3, Unigine Heaven, Metro 2033 + Lastlight and Shadow of Mordor) I occasionally got a 325/405mhz (core/memory) throttle for a few seconds and then every thing returned to normal, in Crysis 3 and Shadow of Mordor I had no throttling at all. The P-state matching didn't help as its obviously throttling to a lower power state. By the way, I'm using a variant of svl7's vbios. There shouldn't be any need for importing the profiles if your using the 359.00 drivers as all the profiles are included with the drivers. The updated profile are needed if your using the older 353.00 drivers. The p-state matched profiles from Nvidia Inspector can be set to be automatically loaded when you start windows. It can improve performance if you are getting throttling to the P1 state, which it doesn't seem to be happening on your system anyway.2 points
-
In M18X-R2 with 980M SLI there some things not fixed yet by vBIOS like the gpu throttling or worse, the power throttling(gpu in low power state mode), and a issue with the second gpu fan not responding right in some systems with 980M sli installed(I'm using Hwinfo64 to help that). In my case with 359.00 drivers there's some occasional throttling like 494/506Mhz GPU core and goes back 1127Mhz again, in 353.00 drivers it works ok with full core gpu speed but sometimes the system for some reason decides to enter in low power throttling mode and the only way to solve that is to reset the machine to get full speed again.1 point
-
Yep that's right, I see no need to match P-states if your not throttling. Prema has been working on a vbios that will work without J95 modding the drivers like he does and will enable overclocking that wont throttle the cards1 point
-
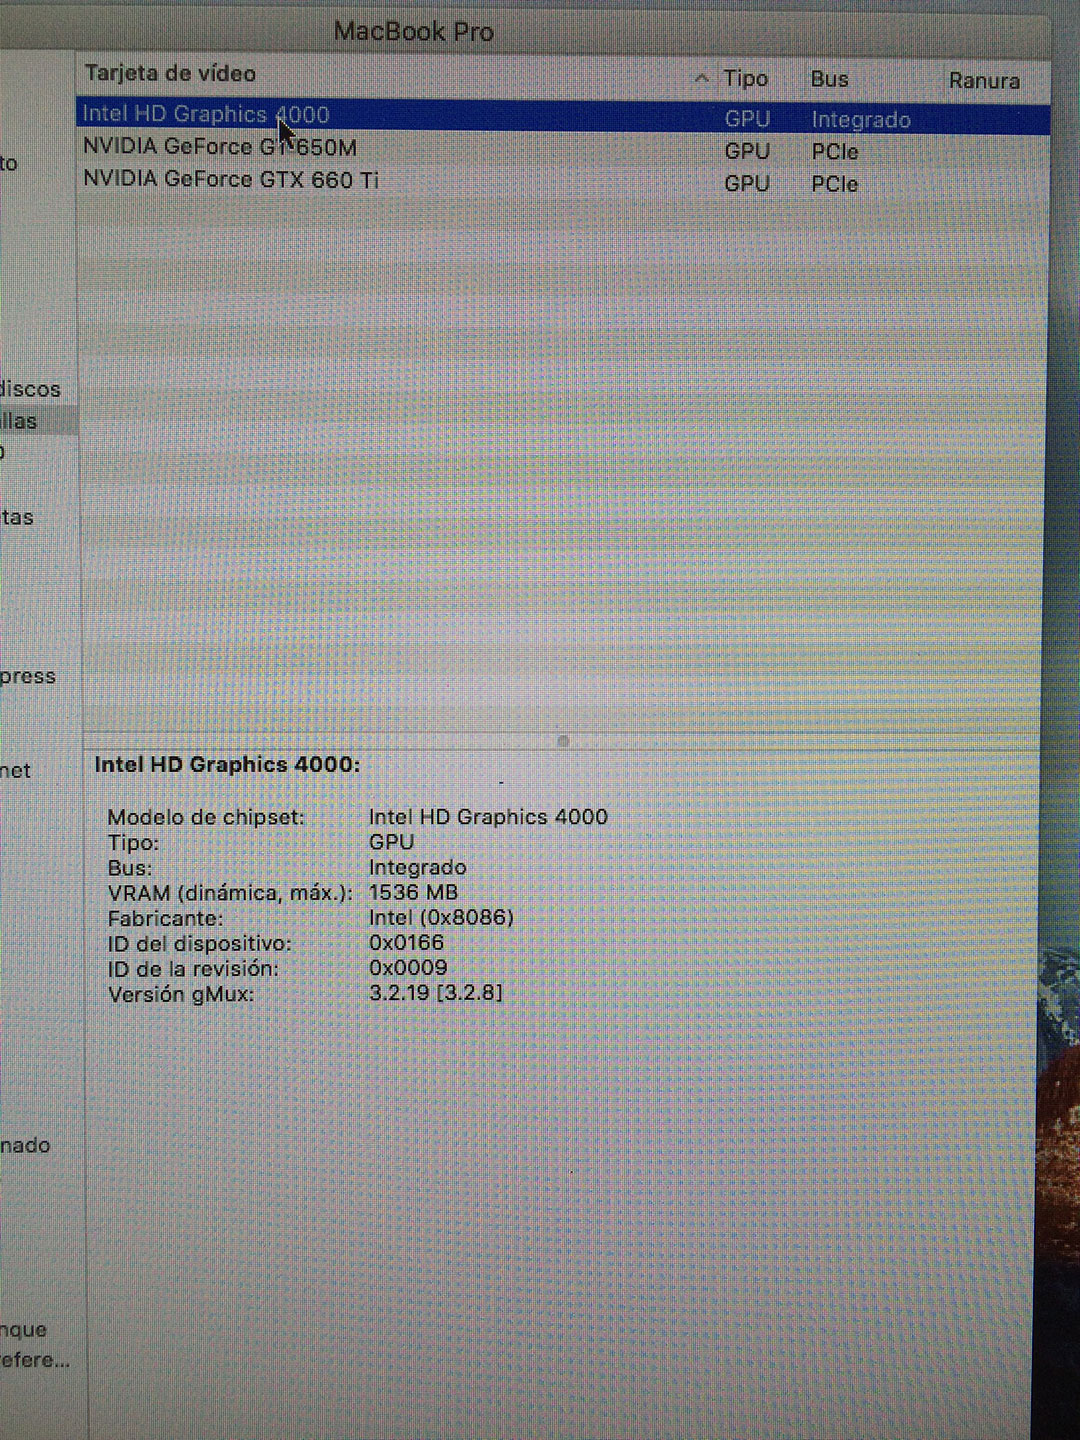
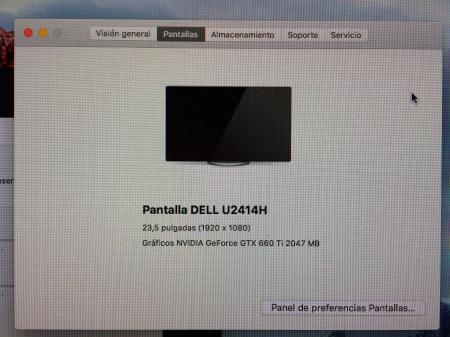
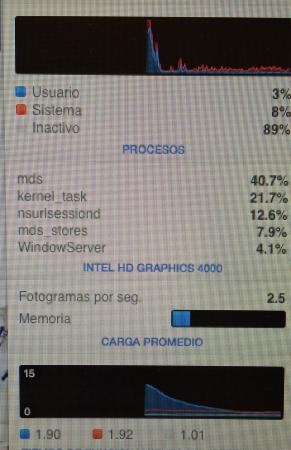
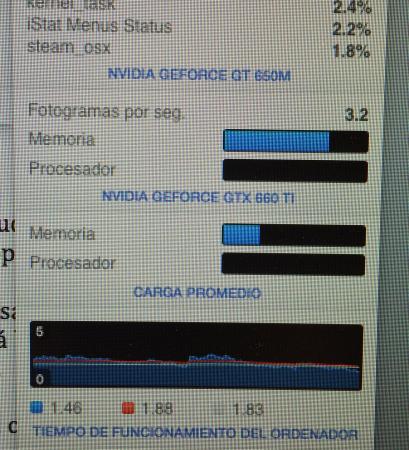
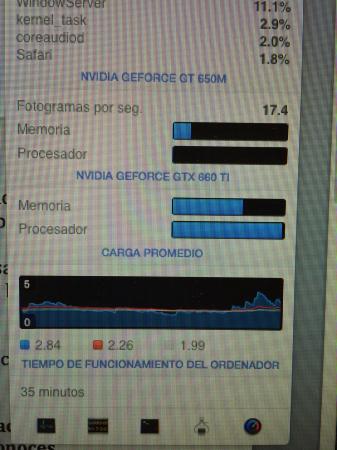
Ok, I´ve been trying different combinations no one is stable with v0.9.6: 1- Automatic gfxCardStatus = NOT STABLE 2 - Force dGPU with gfxCardStatus + ClamShell Mode (Rebooting with the Macbook Screen closed) = NOT STABLE (Internal screen is not recognized by the system And shows frezed image 3- Force iGPU = NOT STABLE (Start system without external screen connected to te eGPU force the iGPU and reboot, without that is not possible to force it) 4- Force iGPU + ClamShell Mode = NOT STABLE (Repeating the steps to disable internal screen in step 2) * I thought this could be the good one So no luck at the moment... What it looks curious to me is that my software monitor iStat Monitor shows the usage if the GPUs and when the iGPU is in use only shows the iGPU in the monitoring screen, but when the dGPU is in use you can see dGPU and eGPU in the monitor software, is like the soft only things that the eGPU is connected when the OS is using the dGPU when in fact in both situations eGPU is in use Last one is with Heaven benchmark running
 1 point
 -
359.00 @ Win 10 - runs as 358.91, no problem so far. Thx @J951 point
-
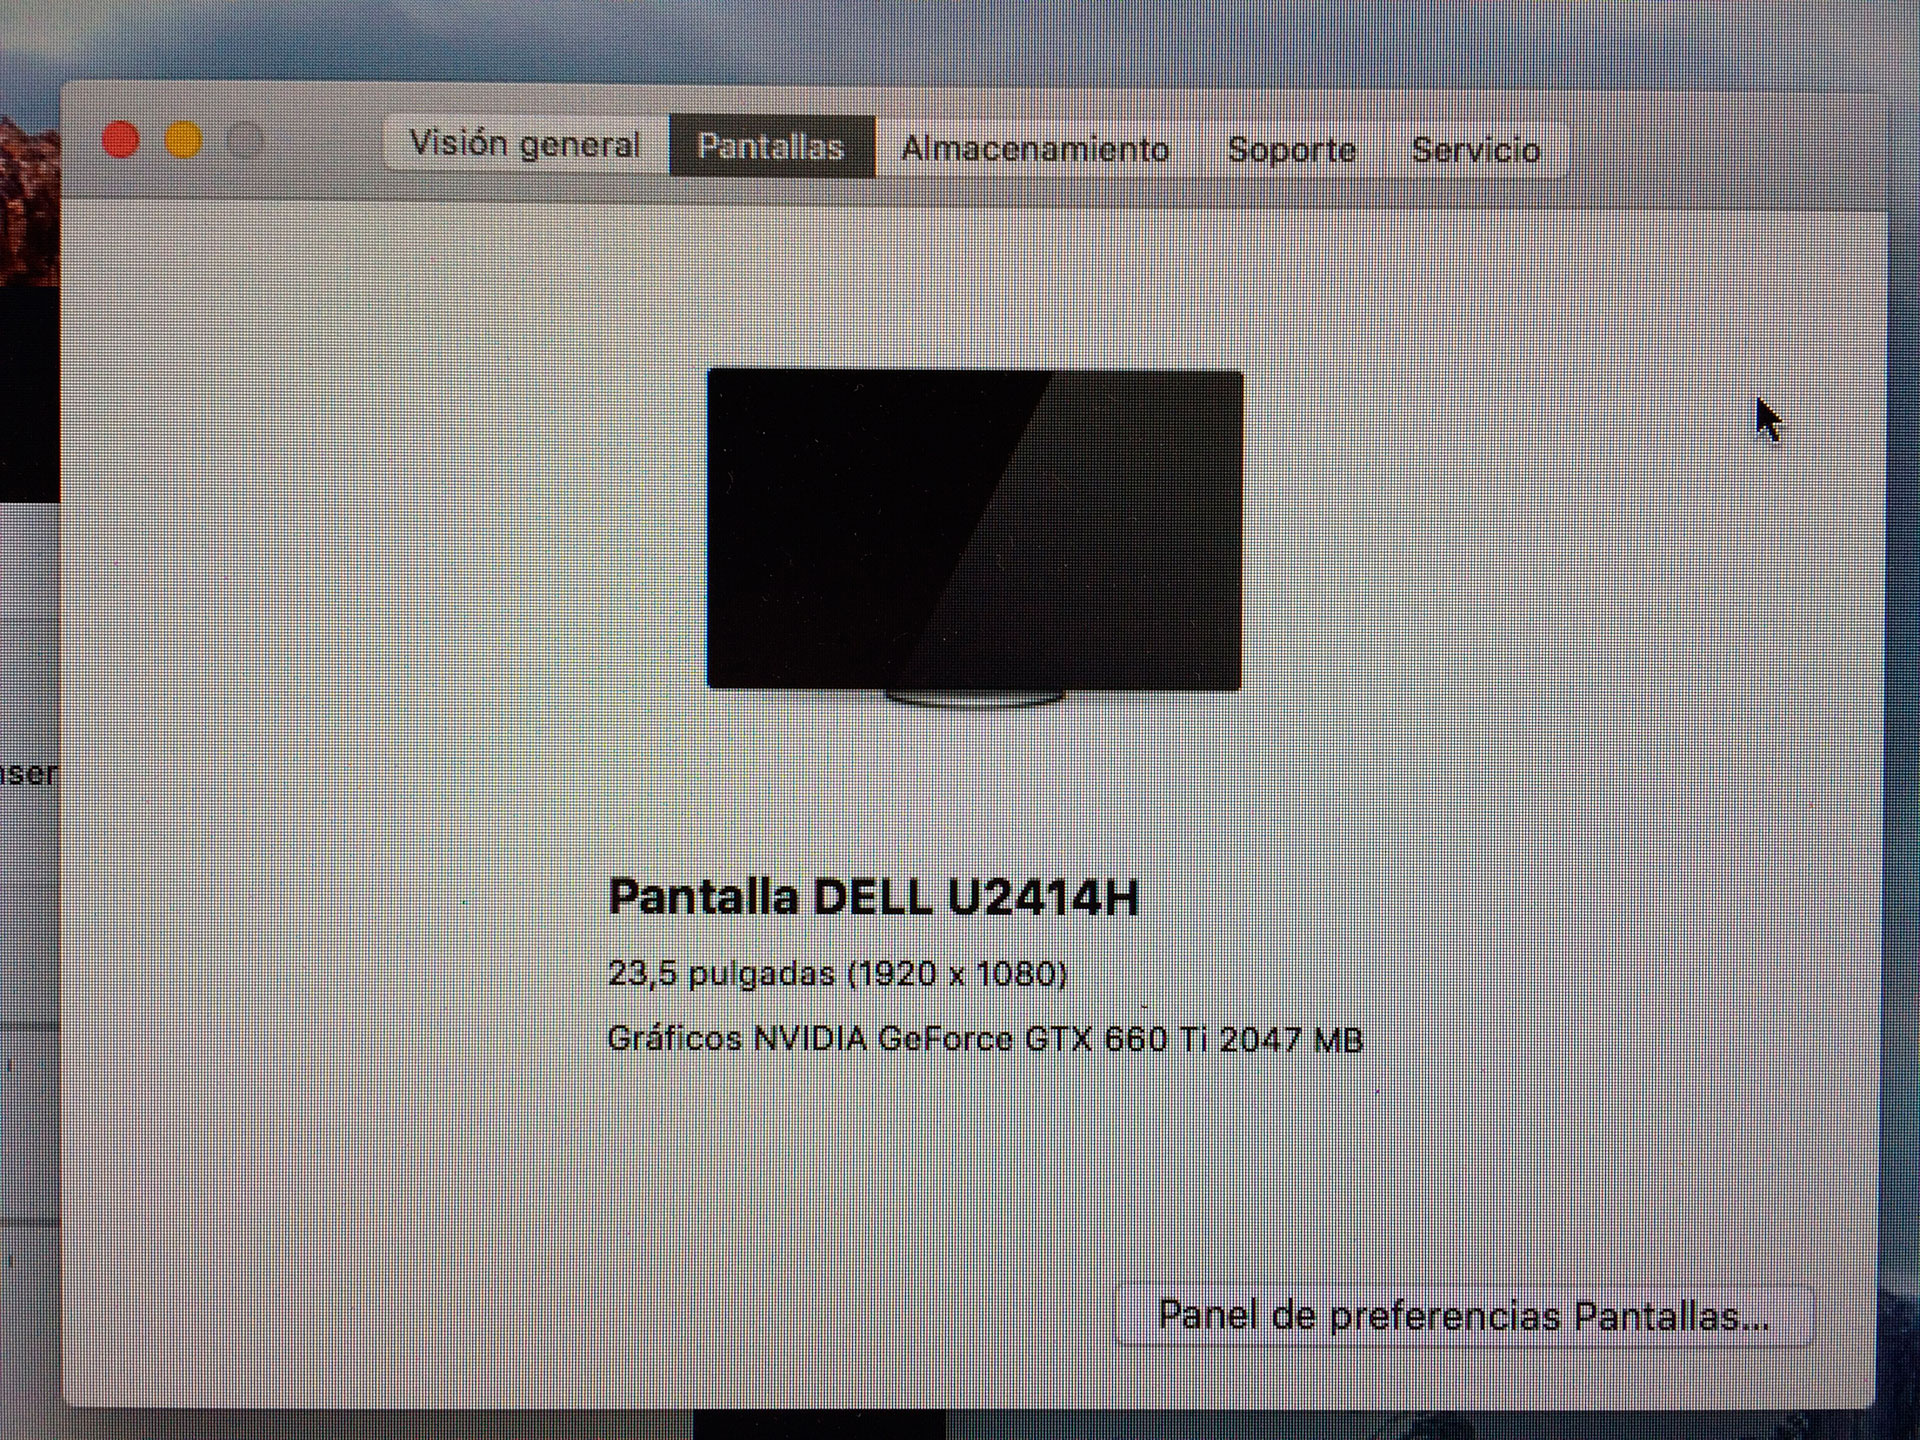
@J95, thanks a lot. All your modified graphics drivers work perfect with my AW 17/R5 and 980m in optimus mode.1 point
-
Hey, so I raised the memory voltage on my MSI 980m 4GB from 1.35V to 1.48V. This improved max stable memory overclocks from 6030MHz to 6412MHz. This was not quite the clock improvement I was hoping for, but still was an improvement. Below is a guide on how to achieve this on my model. Clevo and Dell models likely have the same memory VRM circuit, but check first before messing around. The memory VRM on the 980m is a TI S51211. This is a rather simple VRM, with a negative feedback to control the output voltage. Lowering the voltage at his pin (4th pin on the chip) raises the output voltage. There is a two resistor voltage divider to determine this feedback, and thus the overall voltage. These two resistors are boxed in red and blue below. Vout = R1/R2 (*.7) + .7 This VRM does not read the voltage drop across the inductor and thus does not compensate for it (good VRMs do), so your actual voltage will be slightly lower than what you calculate. Raising the resistance of the "red" resistor, or lowering the resistance of the "blue" resistor will raise the memory voltage. My "red" resistor's unmodified value was 22.12kOhms, and the "blue" was 24.5kOhms. You may realize that this is not quite 1.35V when plugged into the formula, and that "blue" should be 23.5 kOhms. I don't know why this is the case. Maybe my multimeter is that bad. You cannot read these resistances while the resistors are both installed. They will both appear to be in parallel, as power and ground will appear to be nearly shorted when the card is off. I was reading 11.4 kOhm across both resistors when both were installed. You can use this parallel resistance value to approximate the value of the resistor you are modifying without removing them for measurement. I ended up removing the "red" resistor with a heat gun. I then replaced it with two resistors in parallel off of a dead 7970m. These were 52k Ohm resistors, which in parallel would be 26 kOhms. This would have been a lower resistance and thus voltage than what I wanted, so I scrapped one resistor until it was 56.5k Ohms (if you thin the resistor with a flat edge razor, you increase the resistance), so that in parallel they were 27.9 kOhms. I did not do this to the original resistor in case I messed up raising the resistance, wanting to be able to undo the mod if it did not work out. Beware that these resistors are TINY. They are too small to use an iron without losing the resistor in the solder. You need to use a heat gun with variable air flow. To remove a resistor, apply flux around the resistor. This will make the resistor stick to the board area so that when you pull it off, it does not fly away and get lost. Set the air flow to a low speed as well, again to not blow the resistor away. Same process applies for when putting in the replacement. Put a thin layer of flux down, then use a heat gun set to low speed. An easier alternative is to pencil mod the "blue" resistor. I did not do this as pencil mod resistance does not stay consistent over time. I find for about a week the resistance will drop after the mod with the card in use, and after that it will slowly rise over months. I wanted something stable so I knew when I tested for max stable clocks, that those would always be my max stable clocks. Well there you go. Have fun. Good luck not breaking anything. If you do don't blame me.1 point
-
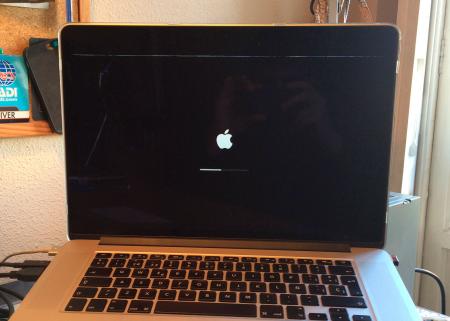
Just boot it up again like you would a non-hibernated Windows. My boot sequence with a not yet hibernated Windows(e.g. after Windows updates have been installed or crash etc.): 1. - Power up Macbook, wait for chime - Press ALT for the boot menu to come up - Power up the already plugged in eGPU - Wait a few seconds - Boot Windows You do this additionally if you boot a not-yet hibernated Windows: 2. - At login screen right click on the power button and choose hibernate. Macbook will "shutdown", it's powered off completely(=hibernate, not standby). You can also login and hibernate afterwards, doesn't matter. - Leave eGPU powered on, you are allowed switch it off at this point though. Essentially step 1 again: - Power Macbook up again, wait for chime - Press ALT for the boot menu to come up - Wait a few seconds - Boot Windows Done. No constant load on System. I don't know how often I have to tell this to people complaining about this load. Instead of shutting down Windows, you simply hibernate it again. You do this all the time where you do not actually have to reboot(e.g mentioned updates or driver installations). You power off the eGPU when the Macbook is shut off. When booting again you simply follow step 1 again. You should notice that the circle indicating booting Windows will only take a small time of the usual boot time due to being hibernated. I'm using Windows 8.1.1 point