Leaderboard


Popular Content
Showing content with the highest reputation on 04/03/14 in all areas
-
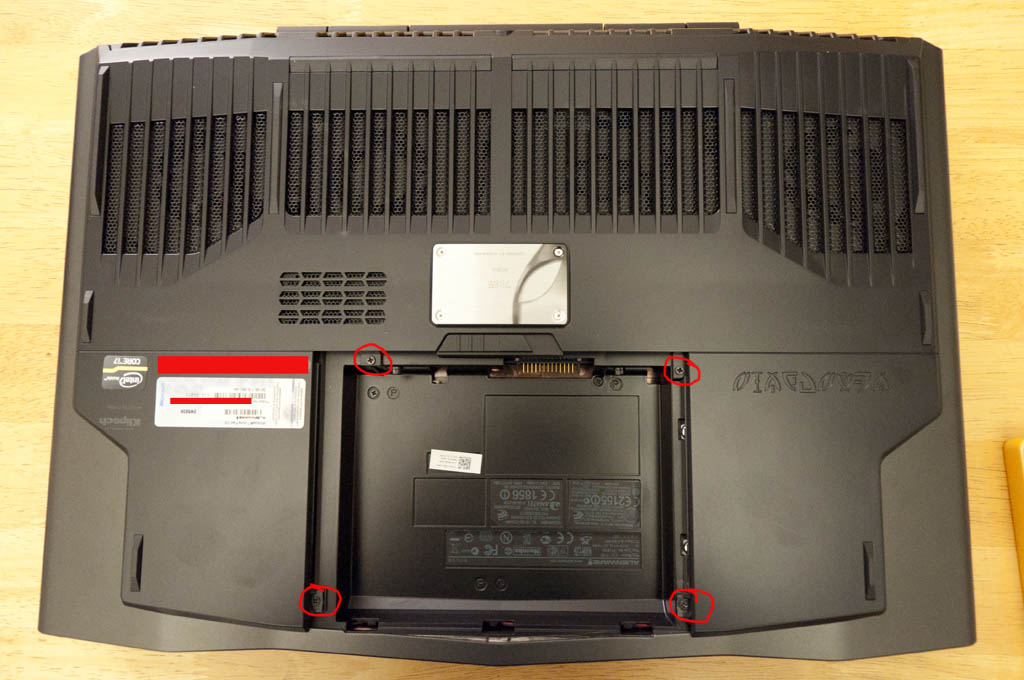
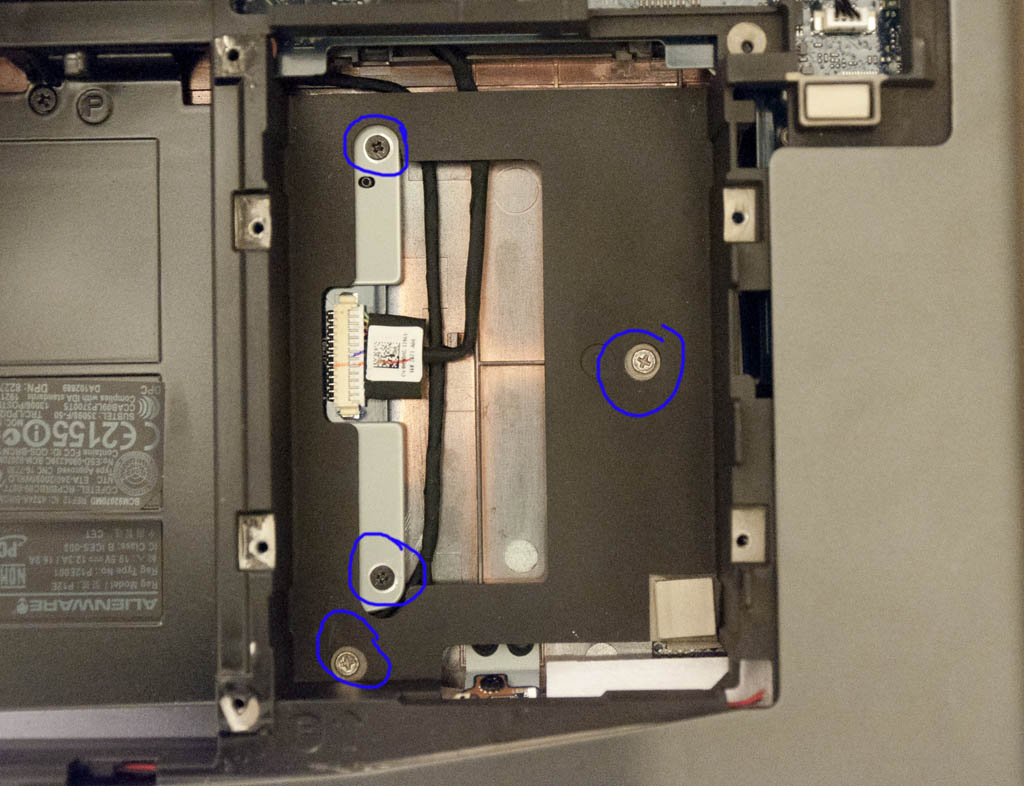
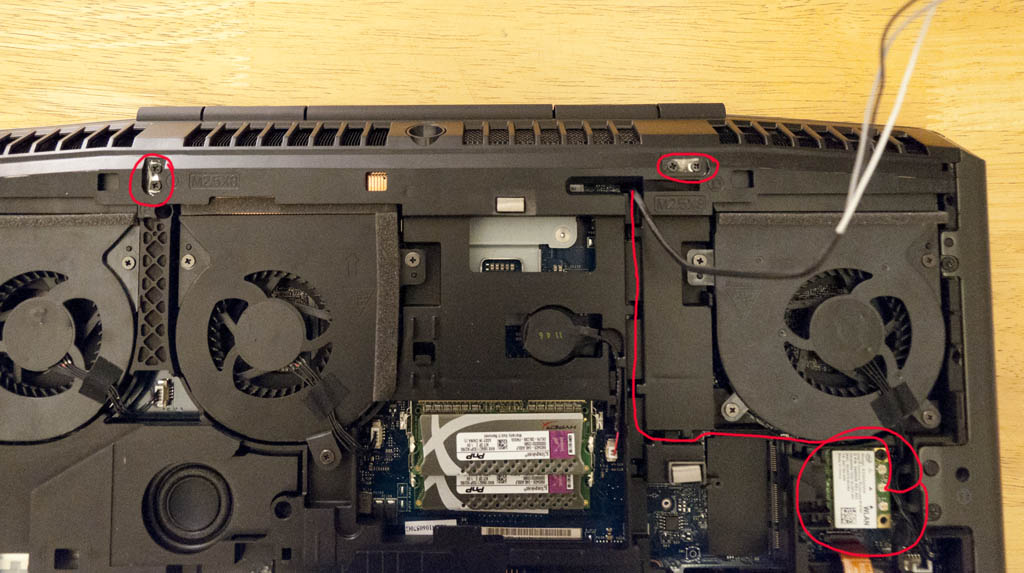
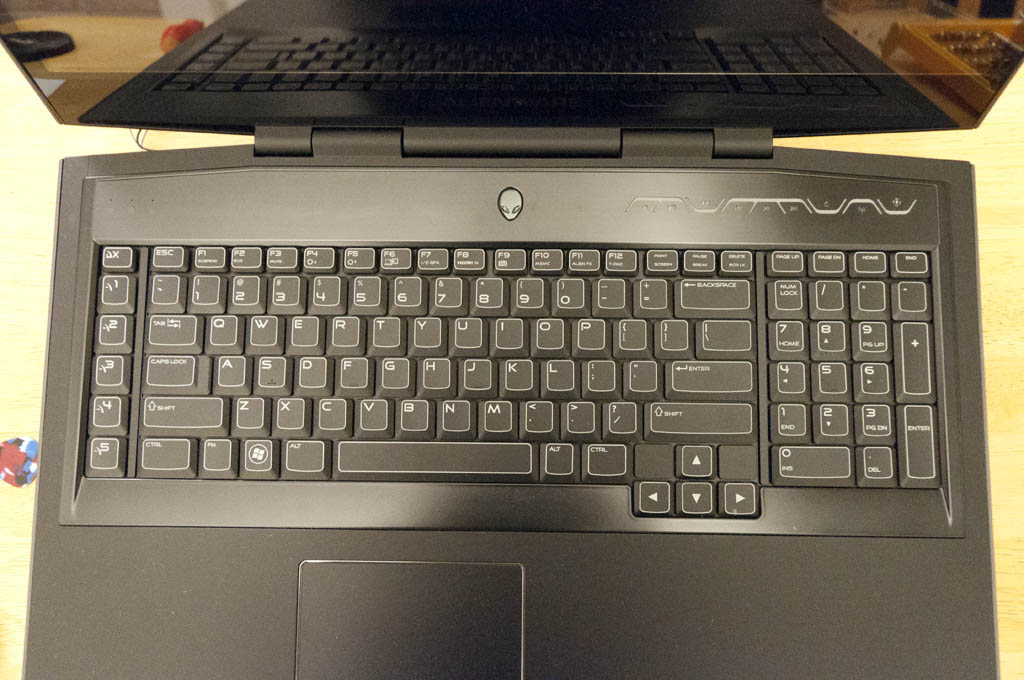
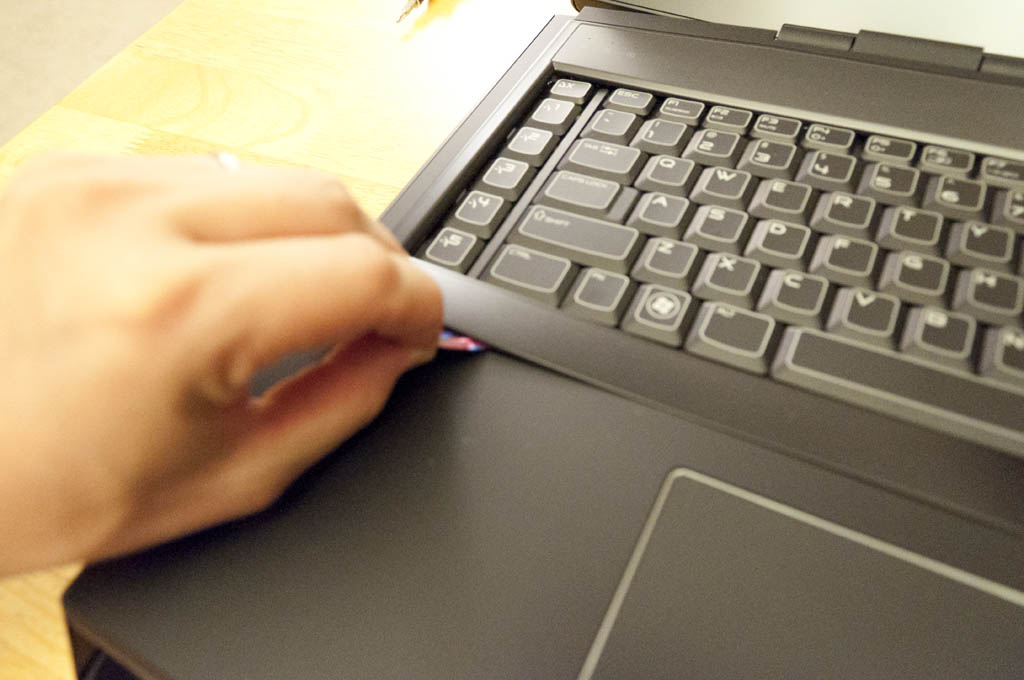
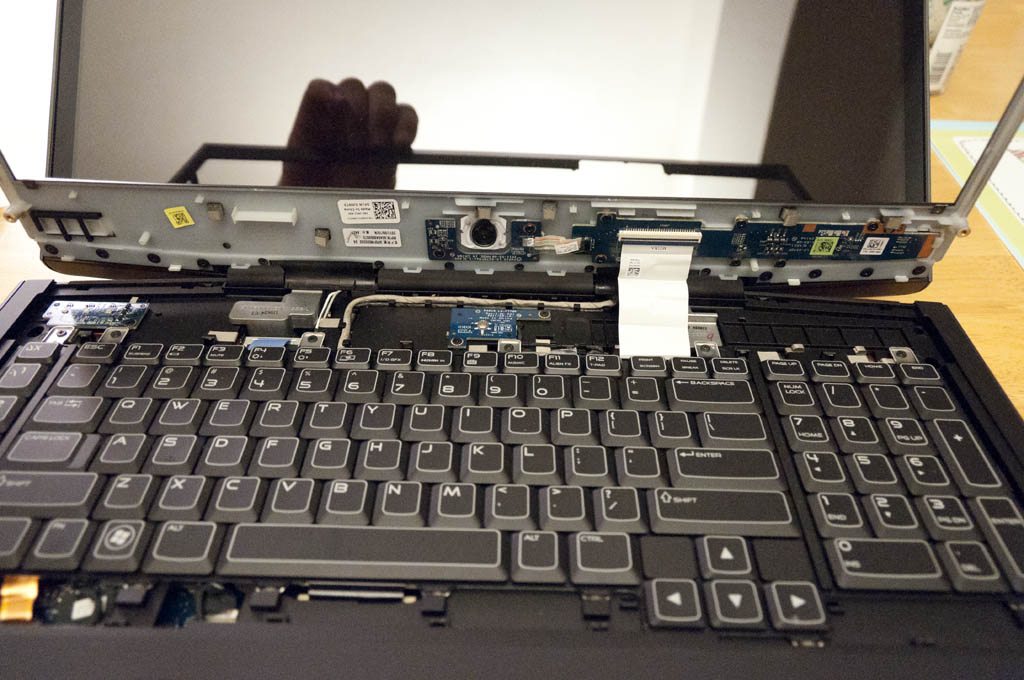
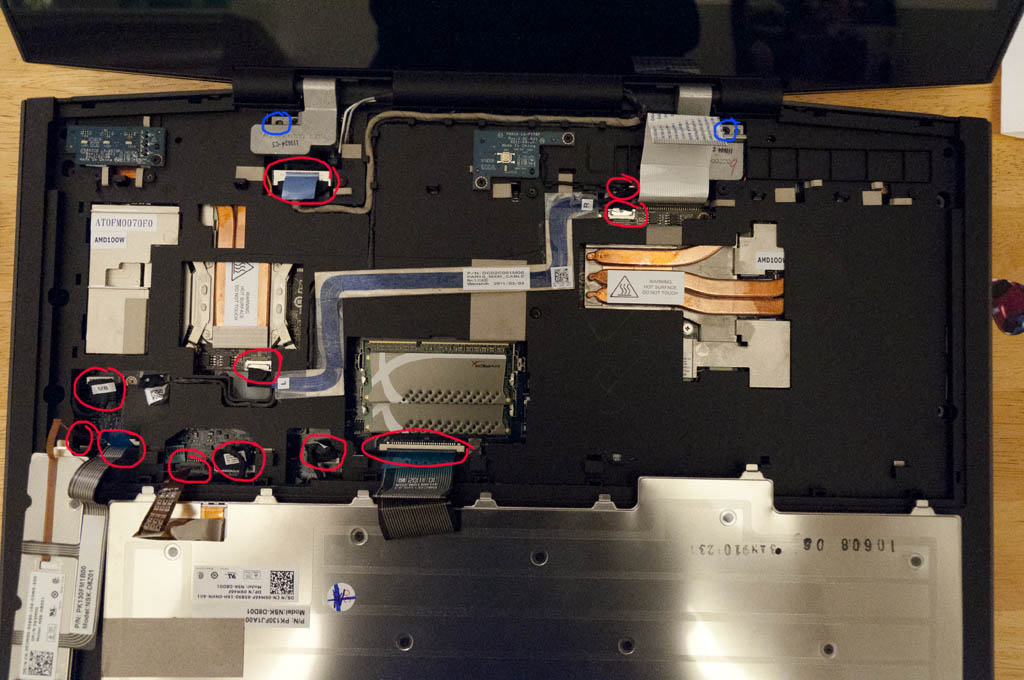
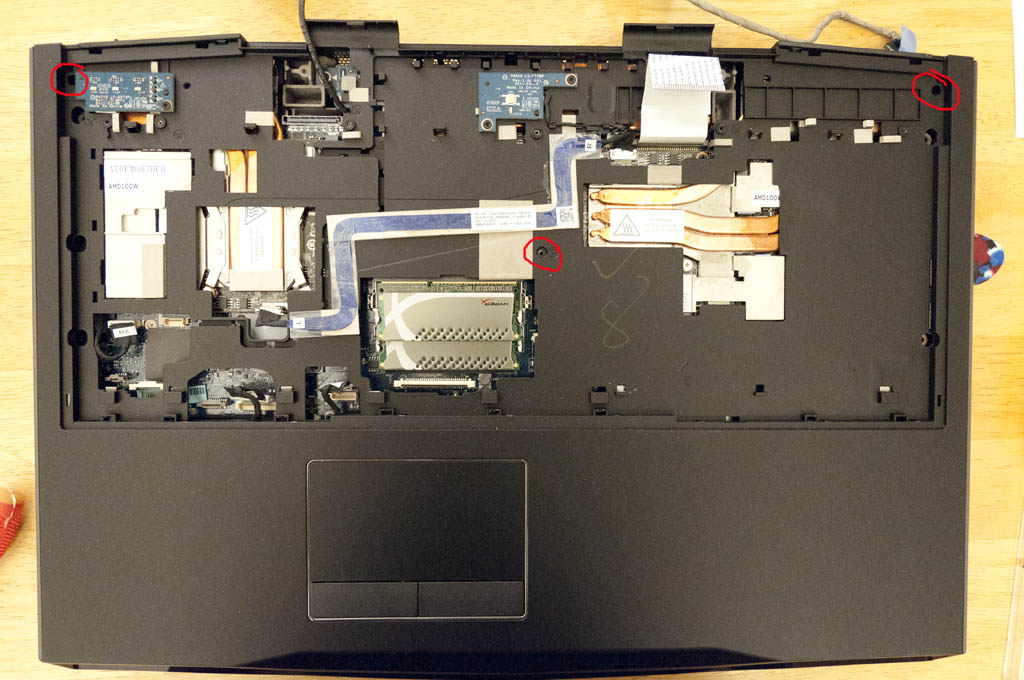
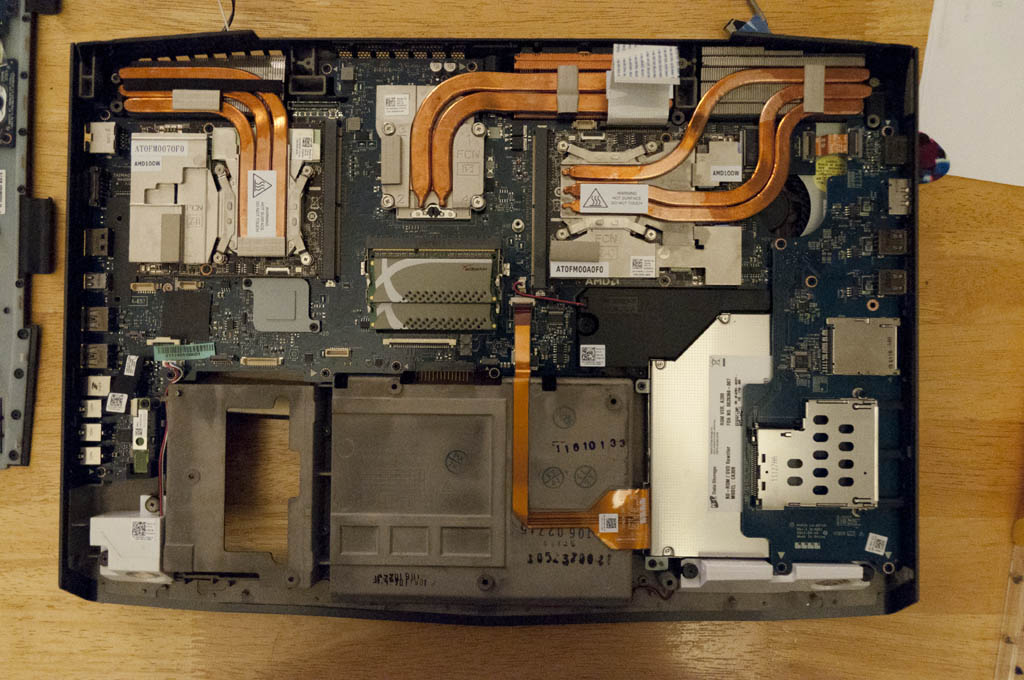
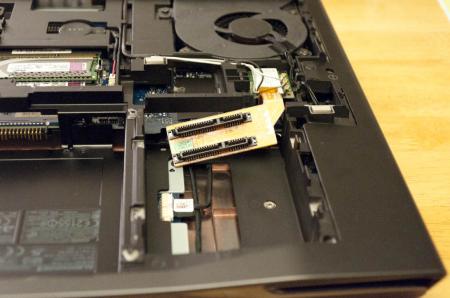
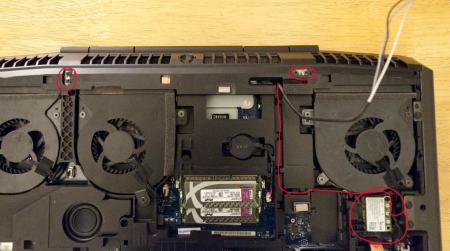
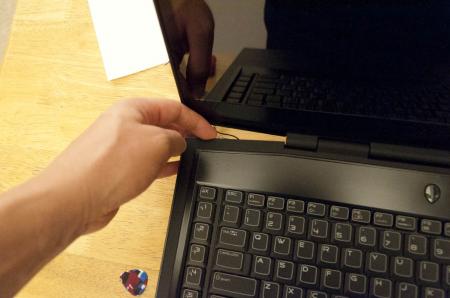
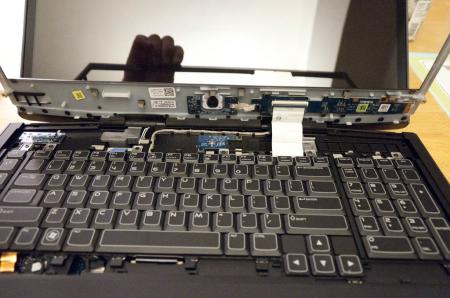
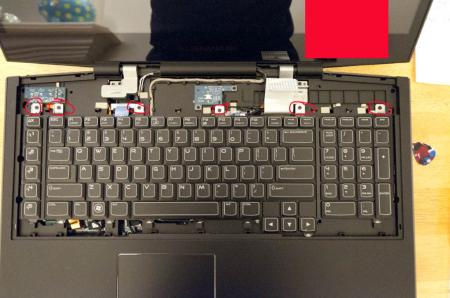
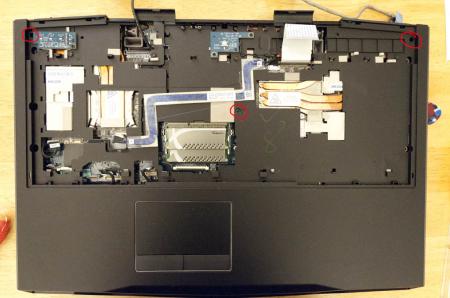
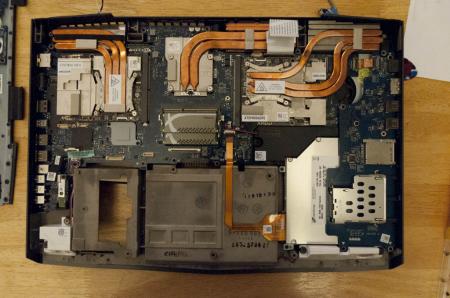
OK, people have been asking for this for a while so I thought since I can tear this down in about 10min, I should do a quick write-up. Like the title said, I did this quick so pictures wont be the best but you will get a better understanding on how to teardown the system enough to at least repaste etc.. Here we go 1 - Shot of the underside 2 - Remove battery and the 4 screws in red to remove bottom cover 3 - Bottom Cover Off: Remove Screws Labeled I (5 of them in Red), P ( 5 in Blue), and HD Bay screws (4 in Green) 4 - Remove Hard Drives 5 - Remove Screws In Empty Hard Drive Bay (4 in blue) 6 - Remove the LCD Hinge Screws ( 4 in Red) and disconnect the wireless antennae (circled and traced in Red) 7 - Flip System over and open screen 8 - Pop off the media control panel by lifting the back right and left corners until it "pops" off. I find using my guitar pick helps with this 9 - Once the back corners have popped loose, run the guitar pick around the edges to loosen the rest (around the keyboard) 10 - Picture of the media panel loose but still connected with the ribbon cable (disconnect this now) 11 - Remove the Keyboard and macro keyboard screws ( 6 in Red) 12 - Disconnect all cables from the motherboard and graphic cards ( 11 in total) and 2 more lcd screws ( 2 in blue) This includes: 2 ribbon cables for the macro keyboard 2 ribbon cables for the keyboard 3 for the handrest/trackpad (2 on bottom, 1 near the right crossfire cable connector) 2 for the screen (one toward the bottom left, one at the top left) 2 for the crossfire cable (labeled L and R on the cable) 13 - Remove 3 more screws securing the cover ( 3 in Red). You will need to pop off this cover starting at the back... just lift until it pops off. If it is being difficult, make sure all screws labeled "P" on both the top and bottom are removed. 14 - Once the cover is off, remove the screws (going from #1-4) on your heatsinks.... clean and repaste. If anyone wants pics of the heatsinks removed just let me know (I took a couple but not really necessary for this guide). Once again, I did this all very fast so I know it is not as polished as it could have been.... but I wanted this out sooner than later for everyone to use. Let me know if anything is unclear etc... D.


 1 point
 -
I have the M18xR1 with a 2920xm and 780m SLI - it runs with the 330w adapter, but I can not take full advantage of the CPU and GPUs with the single 330w. I have all the pieces for the dual adapter mod Mr. Fox developed, just need to set aside time to get it done. The benchmarks I've run since upgrading have shown that as I push the CPU and GPUs it gets starved for power, but the temps are still very good, so just need more juice! Edit to add: If you're planning to run stock and not benchmark - should be no problem, I don't see any issues with power demand at stock.1 point
-
This guy Laptop Forums and Notebook Computer Discussion has M18x R1 with dual gtx 780m. Check his profile on the link and send him a message. I think its possible because you're cpu is not even extreme and the 330w AC adapter is sufficient for that setup. To be certain ask him.1 point
-
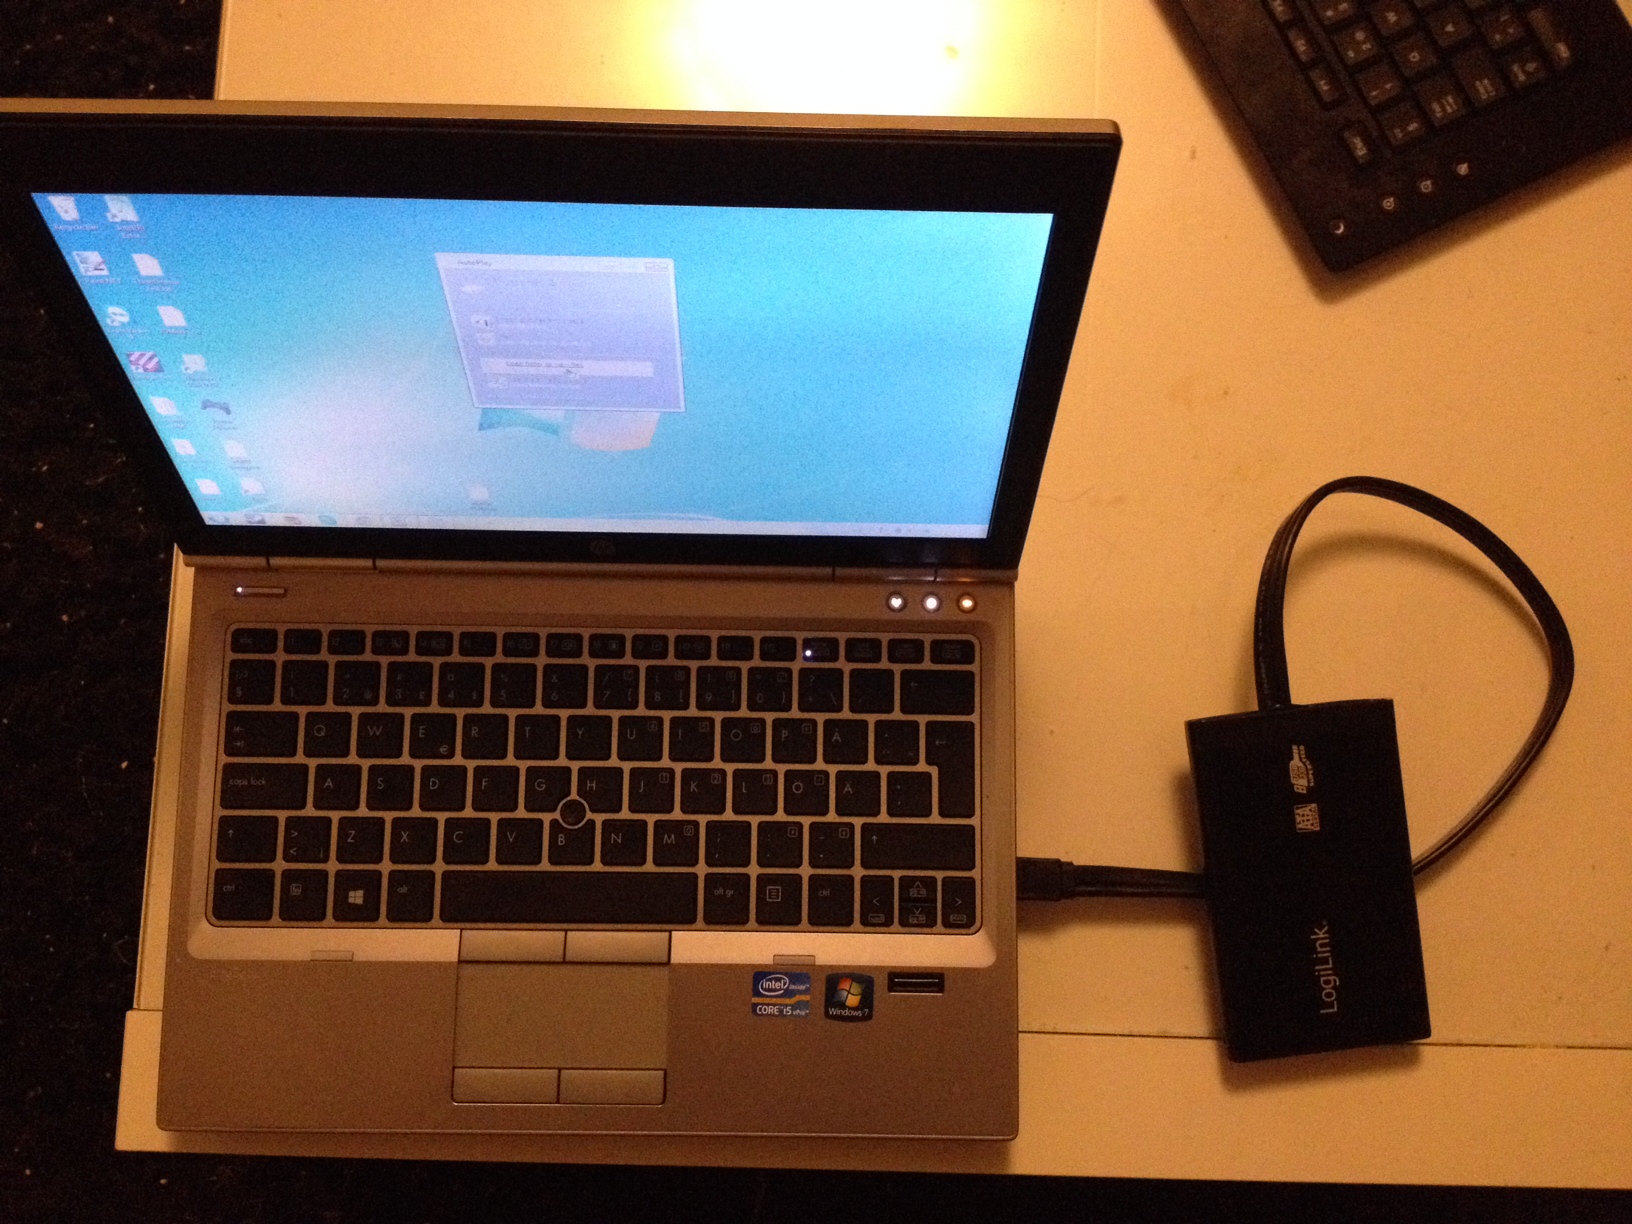
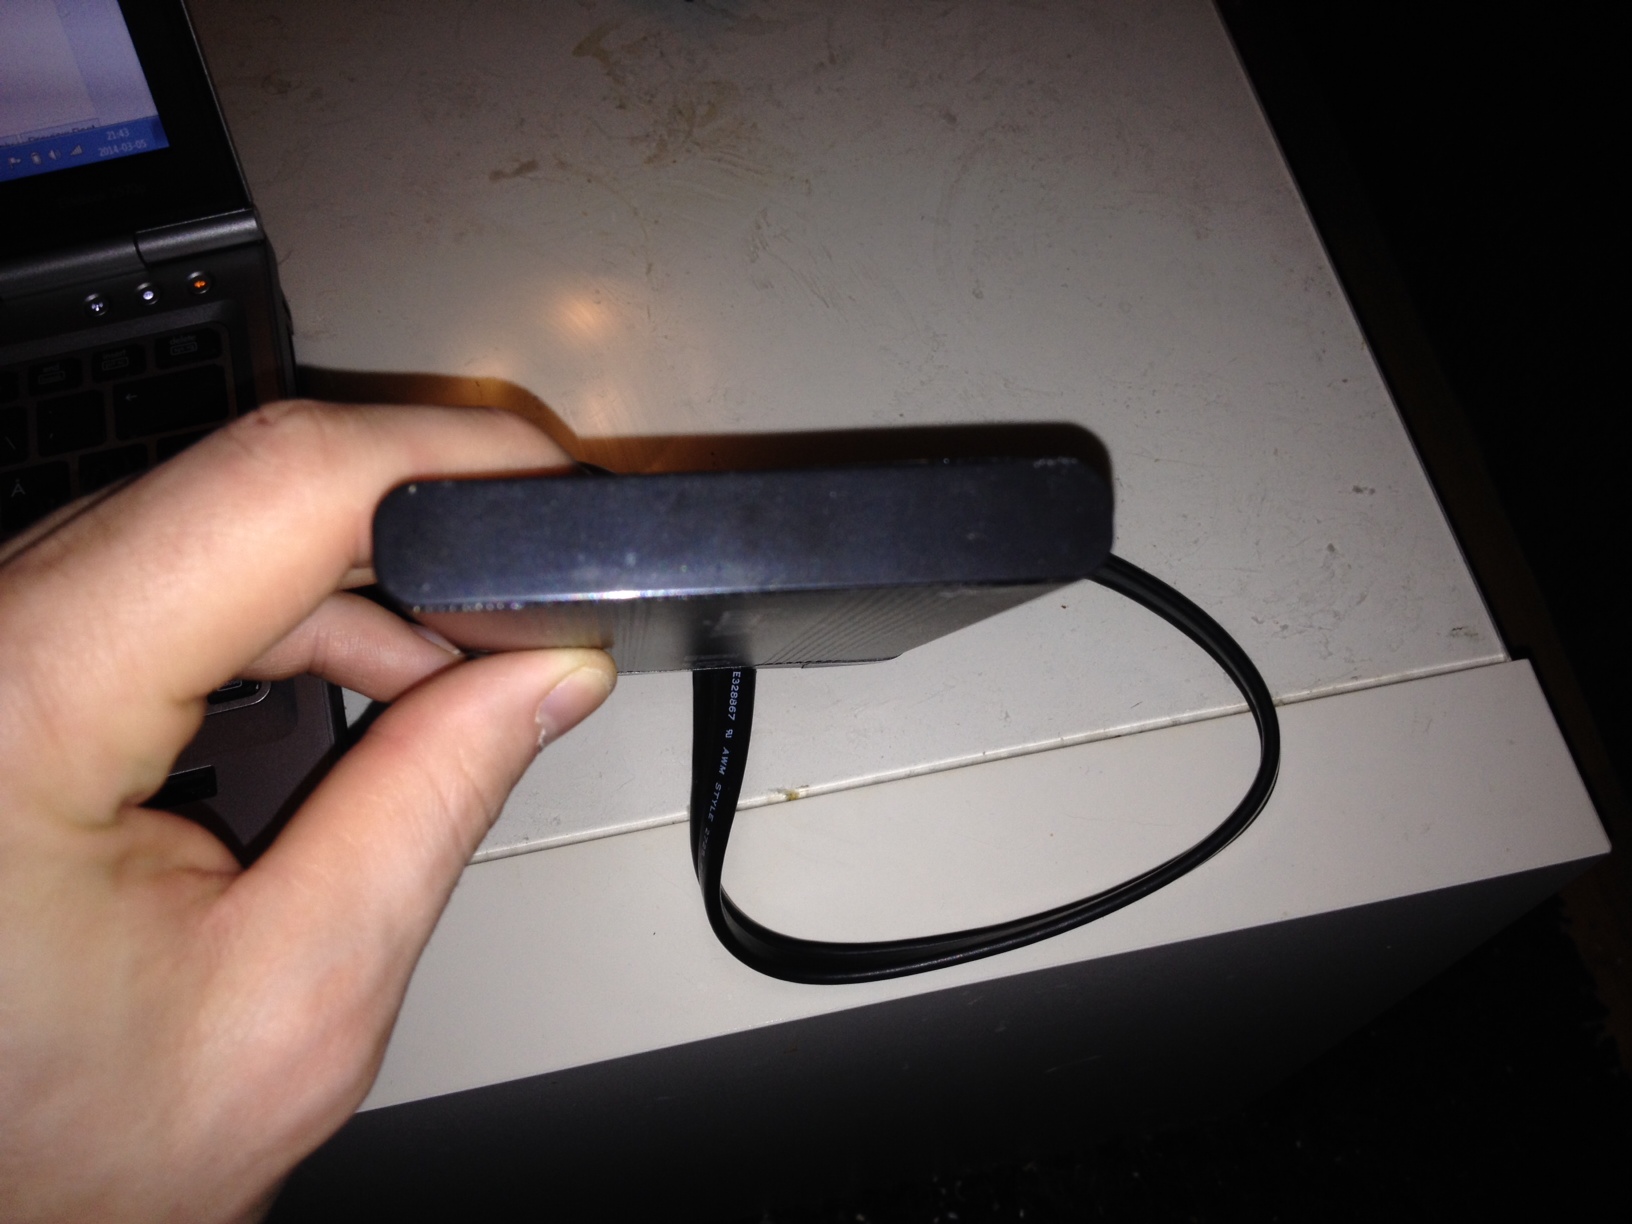
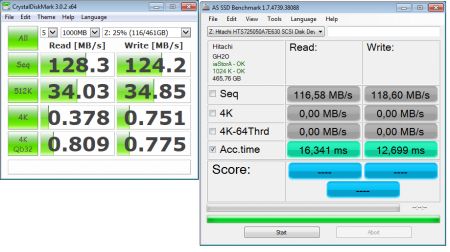
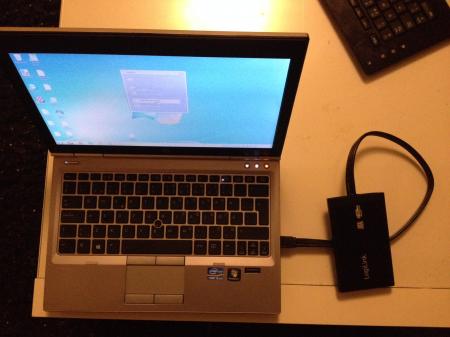
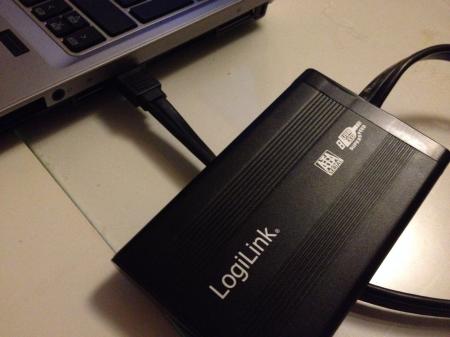
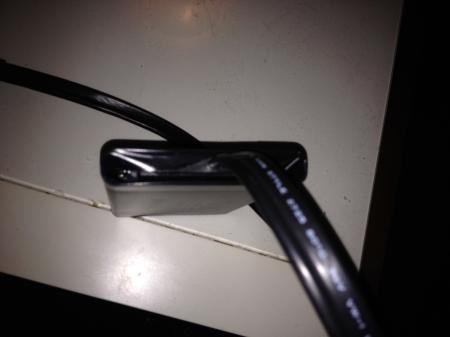
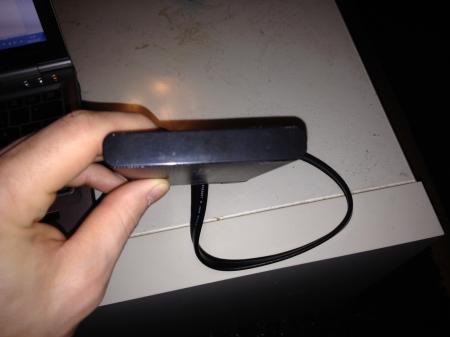
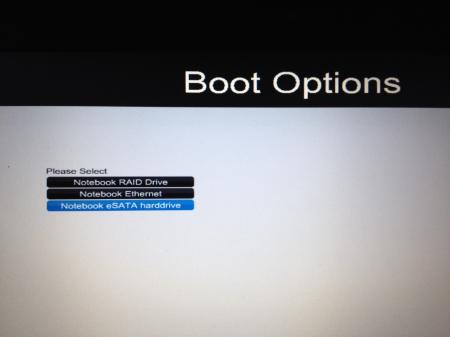
Introduction - Just convenient! Ever since I installed my SSD raid my original HDD has just been laying around collecting dust. I like the thought of being able too boot a secondary OS from the hard drive w/o messing with my raid config, Personally there are a couple of applications that immediately comes to mind: Secondary boot option: For a while I really wanted to test out Win8.1, maybe and even OSX, Pretty fast file transfers: Look at the results The notoriously large steam folder? Now I need to find a mSATAp to USB3.0 adapter that actually works! Instructions What do I need? $4 - eSATAp to SATA cable $4 - USB 2.5" HDD enclosure $5 - (optional) USB 3.0 to eSATA adapter <- Turns out this is just crap, doesn't work for mSATAp $? - 2.5" SATA drive $1 - Electrical tape Installation Remove the USB-interface completely from the enclosure (leaving an open end) Connect the eSATA cable to HDD Wrap each short end of the HDD with a cut out stripe of bubble wrap and secure it tight with electrical tape Now the HDD should fit real snugly into the enclosure (should be a little struggle) Thats it! IDEA: By carving hole for the eSATA cable in the unused USB face plate you can make this even nicer! Results The enclosure: eSATA benchmark: AS SSD & CrystalDiskMark USB 3.0 benchmark: AS SSD & CrystalDiskMark in progress Interrupted boot: You can see that our system is capable of eSATA boot eSATA OS boot: in progress
 1 point